Hi everyone,
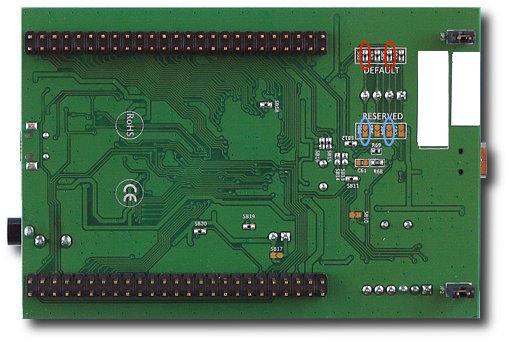
As promised in the previous post. Here is a short write up how to download, compile and upload your first example program using libopencm3 and a STM32F4 discovery board.
Very similar process will apply to any other evaluation boards that employ an STM32 microcontroller and Black Magic Probe JTAG/SWD programmer. Like for example Lisa/M, Lisa/MX, Lisa/S, Apogee and so on.
Step 1
If you did not already do that, download and install GCC ARM Embedded. You might have already done it if you were “fixing” your Discovery board.
You can download the compiler from here: https://launchpad.net/gcc-arm-embedded
Unpack it into your home directory:
cd ~
tar xfvj ~/Downloads/gcc-arm-none-eabi-replace this with the version-mac.tar.bz2
You should add the binary directory of the newly unpacked compiler package to your system. Obviously to do this you add the directory to your PATH environment variable. If you don’t know what that is you should learn a bit more about your Unix/Linux basics. 🙂
export PATH=~/gcc-arm-none-eabi-someversion/bin:$PATH
To make this addition persistent you can also add that to your .profile, .bash_profile or .zprofile depending on the shell and setup you use.
Step 2
Download libopencm3-examples. You can find this repository at https://github.com/libopencm3/libopencm3-examples
git clone git@github.com:libopencm3/libopencm3-examples.git
Step 3
Build the libopencm3 examples. The repository contains libopencm3 as a submodule so you will have to initialize and update the submodule before you can compile the library itself as well as all the different examples.
cd libopencm3-examples
git submodule init
git submodule update
make
This will take a bit as there is a lot of examples included in that repository. In the past the examples were part of the main library itself but there became so many of them that we had to split it off. Otherwise the build and clone process just took too long.
Step 4
Prepare your environment. To make your life easier you should set up your .gdbinit configuration file. This will make the firmware upload and debug process so much easier. Just add the following lines to the .gdbinit file:
set target-async on
set confirm off
set history save
set mem inaccessible-by-default off
tar ext /dev/cu.usbmodemSOMESERIAL1
mon version
mon swdp_scan
#mon jtag_scan
att 1
Note: On linux the cu.usbmodemSOMESERIAL1 becomes ttyACM0.
For reference here is the breakdown of what the commands inside of the .gdbinit file mean:
- set target-async on: Enable background execution commands.
- set confirm off: This disables the really annoying “are you sure” questions. 🙂
- set history save: This forces GDB to save the command history.
- set mem inaccessible-by-default off: This is one of the most important commands here. Very often when you are trying to debug your code on a microcontroller you have to read the content of memory mapped registers. If you don’t set this option the debugger will prevent you from doing so as it has no idea that this memory is actually accessible. On a PC having the option on makes total sense but on a microcontroller it is mostly a burden.
- tar ext /dev/cu.usbmodemSOMESERIAL1: tell gdb to connect to Black Magic Probe
- mon version: Print version of the Black Magic Probe.
- mon swdp_scan: Scan for devices using SWD protocol.
- att 1: Attach to the first process. On a microcontroller you will have only one process…
Step 4
Upload fancyblink example. The simplest example for the STM32F4 Discovery board is the fancyblink example. It is also very easy to upload. As long as your Discovery board is “fixed” and uses the BMP firmware.
cd examples/stm32/f4/stm32f4-discovery/fancyblink
arm-none-eabi-gdb fancyblink.elf
load
run
Now the LEDs on the Discovery board should be blinking. You can interrupt the execution of the program by pressing <Ctrl>-C. You can continue the execution by running cont.
Here is a short reference of GDB commands that you might find useful when playing around with code:
- load -> load the binary from the provided elf file. (Note: it detects if the elf file changed on the hard disk and loads a new one if available. So you don’t have to quit GDB every time when you recompile your code)
- run -> start the execution of your firmware
- backtrace -> print the call stack trace of the current line of code being executed
- make -> runs make command in the directory you started gdb. Very useful if you want to update the binary you are running really quick.
- break filename:lineno -> you can add a breakpoint inside your code. GDB will stop the execution of the program as soon as the line is hit by the firmware.
- step -> execute one single line of code and return back to the command line
- next -> same as step but it does not enter into the functions called and skips them. Useful if you want to step over functions you know take forever and you are not interested in what they are actually doing. 🙂
- print variablename -> print the content of a variable
- print/x variablename -> print the content of a variable as HEX
- list -> prints the context of the line being executed at the very moment
- kill -> if used in a GDB script it will reset the MCU and exit GDB. Very useful as last command of a GDB script.
I hope this will be helpful for you.
Cheers,
Esden
P.S. Big thanks to Jack Ziesing for proofreading and introductory paragraph and sparking the work on this article. It is a great help! 🙂


